
5 Critical Steps in Preparing a Tooth for a Dental Crown
January 29, 2024
During a royal coronation, a crown is set upon the sovereign’s head. Obviously, a lot of fanfare and ceremony come with the occasion, but the act of placing the crown itself is pretty fast and simple. To the layperson, putting a dental crown on a tooth can seem just as straightforward—just attach it over the top, right?
Although dental crowns are also referred to as caps, it doesn’t necessarily mean they can be put over teeth without any prework. In fact, there are five steps your dentist must take to give you a dental crown properly. Keep reading to learn more about this process.
Step 1: Numbing the Area
Whenever you have any work done on a tooth, you’ll need to receive a local anesthetic. Although teeth are surrounded by a layer of hard enamel, this outer protective shield is relatively thin, and just underneath are more sensitive tubules that connect directly to the nerve.
Before altering your tooth, your dentist will give you a local anesthetic to keep you comfortable and pain free throughout the process.
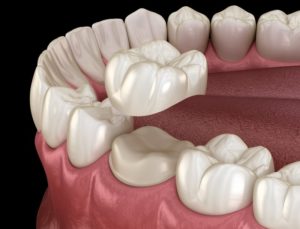
Step 2: Removing Enamel or Infected Structure
Depending on the reason for getting a dental crown, the tooth will undergo some amount of change. If the tooth is fractured or infected with decay, the damaged portions of the tooth will be taken away, leaving healthy structure behind. In some situations, root canal therapy may be required, which entails delving into the tooth and taking out its nerve and then sealing it from reinfection.
Even if the tooth is healthy, about 0.5 millimeters must be removed to make space for the crown. Otherwise, the prosthetic would appear unnaturally large and draw unfavorable attention to itself.
Step 3: Taking Impressions
After the tooth has been reduced, your dentist needs to take a record of your upper and lower teeth so that the lab can fabricate your custom crown. Traditionally, these impressions required pressing a messy putty substance against the arches. Cutting-edge technology, however, makes the impressions process much more comfortable. A digital scan accurately measures the mouth and creates a 3D model for the lab to craft a perfectly fitted crown.
Step 4: Attaching a Temporary Crown
A prepared tooth may be all set for a crown, but it is vulnerable and more sensitive. To protect it while the customized crown is being created, a temporary crown is placed over the tooth. This generic prosthetic may not fit completely, but it is usually worn just for a few weeks until the lab sends the finished product.
Step 5: Bonding the Custom Crown
Returning to your dentist’s office when they receive the custom crown, you then have it cemented onto the tooth. At that point, it should blend in perfectly with the rest of your teeth and function just like the others.
Although your dental crown doesn’t come with a kingdom, it can leave you with a royal-worthy smile. It may take a little more work on your dentist’s part, but you’re sure to have a crown you can depend on for years to come.
About the Practice
Applegate Dental uses the latest in dental technology. For crowns and other restorations, we take advantage of a digital iTero® intraoral scanner, a device that comfortably fits in the mouth and takes precise measurements. As a result, our patients receive realistic crowns that feel natural and comfortable. If you need a dental crown or have questions about the process, contact our West Seneca office online or call 716-712-5301.
No Comments
No comments yet.
RSS feed for comments on this post.
Sorry, the comment form is closed at this time.